Monday 30 December 2013

Black and Red

Good Morning fellow bloggers! I hope you are all well:)
This is just going to be a short post today as I have got to go into town to buy a new fridge freezer:After 4 attempts at mending and lots of food wastage Mr Know How insurance man has finally said we are entitled to a new one under the conditions of the insurance we took out when we brought it:) Yay! finally :)
So my card today that I have chosen is this rather regal black and red card. I am also thinking that this card, with the sentiment removed would look lovely in a frame!  What do you think?

 
I have made the flower using Spellbinder Labels Twenty Four which is on my list of 'to do tutorials'.
 
 
Products Used:
  • Cardstock: Foundations
  • Stamps: Elegant Corners Labels Four Background, Vintage Oval Labels, Vintage Floral Labels
  • Dies: Fancy Framed Tags Two, Labels Twenty Two, Labels Twenty Four and Labels Four
  • Stickles Glitter: Diamond
  • Embossing Powder: Cosmic Shimmer Detail Black
  • Embellishments: Creative Expressions Black flat Pearls and clear Sparkler
Sorry it is short and sweet! Take care and enjoy the rest of your day:) x
Don't forget I have a blog giveaway if you haven't already entered. Click on the blog giveaway on the side bar and it should take you to the post! x


Saturday 28 December 2013

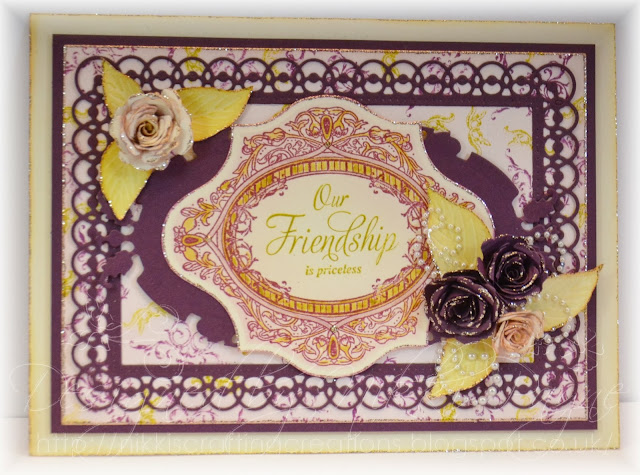
Our Friendship is Priceless -Blog Give Away!

Good evening fellow blogging friends. So that's Christmas almost over and I hope it was all you wished it to be! This year has been an amazing year for me both personally and in my crafting and I am looking forward to seeing what 2014 brings:) I especially look forward to getting to know all of you.....if only through my blog and Facebook! Without you I wouldn't be where I am today so 'Thank you'....I know I have probably said this before but it really does mean so much to me to read your comments and little bits about yourselves.
So as a 'BIG THANK YOU' I will be doing regular blog giveaways which will include a card and a few crafting goodies too. I will put all of you into random org so you will all have a chance of winning and I will make the first drawer next Saturday:) So good luck to you all!!! x  Just leave your name/comment on this blog post!

I love the rich colours of purples, gold and olive green on my card today! I hope you like it too!


Products Used:
  • Cardstock: Foundations
  • Stamps: Justrite Stamps -Vintage Oval Labels
  • Dies: Justrite - Vintage Labels Six,  Spellbinder - Labels Thirteen  Bitty Blossom, Card Creator - Detailed Scallops, A2 Matting and Layering Basics B
  • Embossing Folder: Couture Creations - Jazmyne (fussy cut out for the leaves)
  • Stickles Glitter: Mercury Glass
  • Creative Expressions: Pearl swirls
  • Distress Inks: Milled Lavender, Crushed Olive, Seedless Preserves
A quick run down on how I created my card:
  • I started off with a cream card blank measuring 19.5cm x 14.5cm and inked it a little at the edges with Crushed Olive.
  • I took another piece of cream card and used a mix of the above Distress inks and stamped the small decorative stamps from the Justrite set to create a background. I then matted this onto some deep purple card and adhered it to my card base.
  • I die cut the Detailed Scallop rectangle out and then die cut out the centre using a rectangle from the A2 Matting and Layering die set. I have then adhered this onto my card.
  • I have die cut the Justrite Vintage Labels Six in the deep purple card and cut it in half.
  • Next I have stamped the sentiment and coloured it in with the distress inks a little and die cut it out with the Labels Thirteen die. I have then taken the Labels Six that I cut in half and adhered one at each end at the back and adhered it to the card with foam pads.
  • I have made 2 deep purple Bitty Blossom flowers and 2 cream....distressed a little with Milled Lavender.
  • Next I have taken the embossing folder through my Grand Calibur and inked the leaves with Crushed Olive. I have fussy cut 6 leaves out which I have then added along with the Bitty Blossom Flowers to the card in a cluster at the bottom right of the sentiment and a single flower at the top left.
  •  To finish I have added a few pearl swirls which I have cut up to make smaller swirls and added a little glitter.

Friday 27 December 2013

Heartfelt Creations

Good afternoon my friends! I hope you all had a wonderful Christmas:)
 I must apologise for being quiet over the last week, but with my sons wedding and Christmas it has been rather hectic in the Payne household. I have had my daughter and my 2 grandsons staying with us since the day before Christmas Eve so I decided to give my time to my family and take a break from blogging and crafting until today! They are still here but understand the need for me to get back to work as it looks like 2014 is going to be a very busy year:)
I have some more very exciting news to share with you all but my lips are sealed at the moment but it really did make my Christmas:) I will be able to share with you all very soon though:)
I have a Create and Craft show date for 7th January - 10am and 4pm.....if there are any changes to this I will let you know! So I am now prepping my samples and demos for the show:)
It is time for me to share my Heartfelt Creations card with you all. Again apologises because this should have been on my blog yesterday, but I honestly thought that I had scheduled the post but unfortunately  with all the excitement of Christmas I hadn't clicked the button and only checked in on my blog today:(
Over on the Heartfelt Creations blog you will find a sneak peek at the January release - Majestic Morning and as always some gorgeous inspiration from the design team! So be sure to head on over and take a look:)
Here is my card for today. You can find all of the product details and instructions over on the Heartfelt Creations blog HERE


I must now leave you all and start my prepping for the show, but I will be back soon with some pictures of the wedding and another card:)

Take care and thank you all for your patience on my return to blog land and your wonderful comments....I love reading them:) x

Friday 20 December 2013

Sunnier Days

Good morning fellow bloggers! I am hoping you are all well. Today I am putting together the table decorations for my sons wedding and actually now beginning to panic that I will run out of time:)
Although this is supposed to be such a happy time I am beginning to get rather emotional about it all.....although my son moved out 3 years ago and only lives over the road he is my first baby to get married, but when he put his suit on to show me today I realised he has grown into a very fine young man, giving me 2 gorgeous grandchildren and I am thinking maybe another in the future! I am going to be one emotional but very proud mummy tomorrow:) x
I love this card....the stamps are so pretty and I am really liking the yellow and black combo!
What do you think?


The picture doesn't show it very well, but I have stamped the flowers twice and cut some out and layered them up to add some dimension to the card!
 
 
Products Used:
Cardstock - Foundations
Stamps -Justrite:  Black eyed Susan, Vintage Labels Five
Dies - Grand Squares, Vintage Labels Five, Labels fifteen, Eyelet Pendants
Embossing Folder - Couture Creations - Jasmyne
Stickles - Champagne
Distress Inks - Wild Honey
Creative Expressions Water Colours - Pastels
Embellishments - Bakers Twine - Pastels
 
 
That's it from me today until Sunday:( I hope you all have a lovely weekend and not too stressful:) x


Wednesday 18 December 2013

Heartfelt Creations Wednesday

Morning fellow bloggers! How are you all? Working through all of your to do lists, like me:)
My list should be getting smaller, but for some reason it is getting longer:(.....I forgot to add my nails to the list:( I can't go to the wedding with grubby, inky nails now can I?
So I decided to go for the chop and have my hair cut....hubby thinks it has taken a good few years off me, so feeling pretty pleased with my decision:)x
So to my card today....Heartfelt Creations Wednesday! On the Heartfelt Creations blog today you will find an array of beautiful inspiring projects and also a sneaky peek at the January collection...Majestic Morning! Also a heads up on a very! very! exiting giveaway drawer:)....This one is not to be missed!
My card I am sharing today is using some Floral Key Stamps, Posy Patch flowers and one of my all time favourite die sets Timeless Amour!


You can find all the product details and instructions over on the Heartfelt Creations blog.....And don't forget to check out the Sneak peek at Januarys release:) x
I am looking forward to reading your thoughts on this card!
Take care and enjoy the rest of your day:) x

Tuesday 17 December 2013

Thank you

Good morning everyone!
Thank you all so much for your comments on my cards and understanding that I will not be able to do full instructional tutorial for a while......If I could create more hours in the day then it would be definitely on the top of my to do list:)
I am whizzing through my list of to do's before Christmas though, although I could do with the help of a few little elves to help with the wrapping:). I am so lucky though that my hubby is the cook at this time of year (well actually most of the year) and he has everything planned so I don't have to worry about that part!
I have my hair being coloured today ready for the big day on Saturday.....I have it done at home so I will be able to fit a little crafting in between:) Not sure whether to have my hair cut back into a bob? It has taken me a year to grow it, but I am finding that all I do is put it up like I did for the show.....decisions! decisions!
Oh and in answer to the question...Will I be posting pictures of the wedding and the stationary? I am sure I will be adding a few pictures of the bride and groom:) However I have a little confession....my daughter-in -law to be....Olwen has made everything with a little help from my daughter Sophie. I did help design them though.....but they are gorgeous with a vintage theme. However I am making the table decorations which is on Fridays to do list!
Oooops this was supposed to be a short post today:)
So to my card for today..... A thank you card from me to all of you:)

Products Used:
  • Card: Foundations
  • Stamps: Vintage Floral Labels
  • Dies: Vintage Labels 6, Standard Circles Small, Labels 13, Bitty Blossoms
  • Embossing Powder: Creative Expressions Detail Bright Gold
  • Stickles: Mercury Glass
  • Embellishments: Creative Expressions - Flat Pearls and Scalloped lace
I hope you like my card choice today!
Enjoy the rest of your day:) x

Monday 16 December 2013

Not long now!

Good morning fellow bloggers....How are you all? All shopped out and looking forward to the Christmas festivities? Not long now before we can all sit back, relax and enjoy......well I can dream LOL! I am so looking forward to spending time with my family though, especially watching my grandchildren open there presents....I am so very blessed to have my family live so close to me!
I have now almost finished my Christmas shopping and even sorted my outfit for my sons wedding on which is this Saturday:)
I have had a few days off from crafting but am itching to get back to my craft room to make some Heartfelt Creations samples for the CHA......talking of which! Guess who is going?
Yes! Me:) How lucky am I....I have wanted to go for several years and in January another one of my dreams will come true:) What a brilliant start to the New Year!
I can't wait to meet some of my Heartfelt Creations teamies and also see some wonderful and inspiring new products:)
Before I share my card today I would just like to apologise for not doing my full usual tutorials. Time is of an essence at the moment so I have decided rather than not do any blog posts I will just shorten them so that I can still share my creations with you all.....I will be back to my normal posts soon though:)
My card today is  one that I demonstrated at Sir Stampalot:


Products Used:
  • Papers: Heartfelt Creations -  Vintage Floret Collection, cream and dusky pink card stock
  • Stamps: Heartfelt Creations - Tattered Blossoms and Tattered Collage Background Stamp
  • Dies: Spellbinder - Grommet Tags and Heartfelt Creations Tattered Blossoms and Timeless Amour
  • Distress inks: Milled Lavender and Tea Dye
  • Embellishments: Creative Expressions - Vintage metal corners and Vintage Button, Satin Edged Organza ribbon - Rose, Ivory flat pearls
  • Stickles Glitter: Taffetta
Sorry again for no instructional tutorial:(
Enjoy the rest of your day!

Friday 13 December 2013

Best Friends Forvever

Good morning everyone!  I hope you are all well:) x Christmas shopping all done? That's what I am going to be up to today....shopping with the hubby and then putting the final touches to the Table Plan for my sons wedding which is next Saturday..... so excited:) But I still don't have an outfit.....eeekk Hopefully I will find something suitable today!!!!!

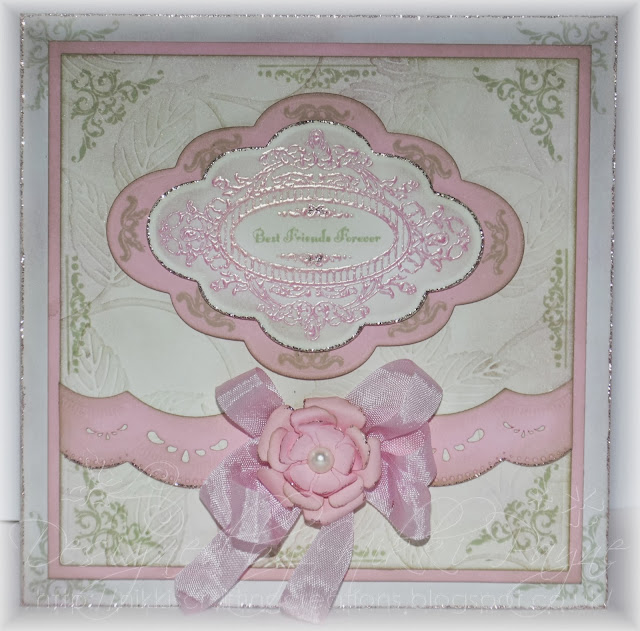
Today I would like to share my' Fiends Forever Card'.....not sure about this one:(


  • First I have taken a 63/4" square card blank in soft pink.
  • In each corner I have stamped the corner stamp from the Justrite Vintage Oval Labels set in Archival Sap Green.
  • Next I stamped my focal image from the same stamp set using Ruby Lapus embossing powder and used the 'Best Friends Forever sentiment' which I have stamped again in Sqap Green ink. I have die cut it out using Labels Six and inked through it with a little Milled Lavender. I have then die cut the next size Label Six out onto pink card and stamped with the small decorative stamp from the same set. (I have inked it with a little Bundled Sage)
  • I have taken a piece of white card measuring 6" square. I have stamped the corners and straight edged tiny decorative stamp onto the card as in picture.  I have used the Jazmyne embossing folder and taken it through my Grand Calibur twice so that it fits my piece of card. I have used Bundled Sage and Milled Lavender over the embossed area and matted this onto pink card and then adhered this to the main card blank.
  • Next I have taken the main Labels six image and matted it onto the pink Labels Six and adhere this to the top part of the card.
  • I have used the Scalloped Border One to create a pink border which I have inked a little with Bundled Sage and adhered to the bottom half of the card centrally.
  • Next I have made a small pink rose from the Rose Creations die set with a small ivory pearl in the centre and adhered it to a small pink seam binding bow.  I have attached this to the centre of the border.
  • To finish I have added a little Taffeta Stickles Glitter:)
Products Used:
  • Card: Foundations
  • Stamps: Justrite Vintage Oval Labels
  • Dies: Spellbinder Labels Six, Scalloped Borders one and Rose Creations
  • Embossing Folder: Couture Creations - Jazmyne
  • Distress Inks: Milled Lavender and Bundled Sage
  • Ink: Archival - Sap Green
  • Cosmic Shimmer Products: Embossing Powder - Ruby Lapus Lustre
  • Stickles Glitter: Taffeta
  • Creative Expressions: Seam binding and Flat pearls. 
I look forward to reading all of your comments on this one....like I said I am not sure about it!
Enjoy the rest of your day:) x

Wednesday 11 December 2013

Heartfelt Creations Wednesday

Good morning everyone!
It's Wednesday!!!! Which means another Heartfelt Creations project:)
I have used the papers from the Floral Key Collection to create my card today, along with  the Tattered Blossom Die and co-ordinating stamps to create a beautiful cluster of flowers in creams and brown tones and finished with a organza bow!


I have stamped the Tattered Blossom onto cream card with Coffee Archival ink and coloured them with Cosmic Shimmer Acrylic Ink - Pearl Shine.


Birthday Wishes
Heartfelt Creations Products and Products carried by HC
HCPC 3468 Tattered Blossoms precut set
HCD 722 Tattered Blossom Die
HCDP1 238 Floral Key Paper Collection
HCD 741 Burnished Key Die
HCD 736 Classic Leaf Die
HCPC 3545 Open Leaf precut  set
HCPC 3569 Burnished Key precut set
452255 Grand Calibur
159223 Paper Blossoms Moulding Mat
459222 Paper Blossoms Tool Kit
Project Instructions:
Other Supplies:
Spellbinder 5 x 7 Detailed Scallops
Brown Organza ribbon
Stickles glitter – Platinum
Cosmic Shimmer Acrylic ink – Pearl Shine
Coffee Archival ink
Shimmer gold card, Brown card, Cream card,
Instructions: Begin with a 7 ½” x  7 ½” cream card base. Cut a piece of brown card 7”x7” and adhere to the card base.  Die cut 2 Detailed Scallop rectangles, cut one of them so that when put together it measures 7” square, and adhere this to the card (the joins will be covered with the bow and the flowers).Choose some patterned paper from the paper collection, cut to 6”x6”and adhere this on top of the now square Detailed Scallops.  Choose a rectangle panel from the paper collection and adhere this to the card, just of centre towards the left.
Die cut and stamp the Classic leaves 4 times. Die cut and stamp the Tattered Blossom flowers, enough to make 3 larger flowers and 2 small flowers. Paint the flowers with the Acrylic Drawing ink.
Die cut the tag from the Detailed Scallops die set in cream card. Choose a sentiment from the Paper Collection and adhere to the tag. Adhere the tag/sentiment to the right hand side of the panel on the card. Adhere the flowers and leaves in a pleasing cluster to the right hand side of the card.
Die cut and stamp the heart from the Burnished key stamp and co-ordinating die in cream card and a small key in gold shimmer card. Make a bow and adhere to the bottom left of the card and add the key and heart to the centre. To finish the card add some Platinum Stickles glitter.

Don't forget to have a look over on the Heartfelt Creations blog for more inspiration from the Design Team!
I will be back tomorrow with another card from my debut show on Create and Craft.
Enjoy the rest of your day:) x

Tuesday 10 December 2013

Thank You!

Good morning fellow bloggers! I hope you are all well x
I can't say how overwhelming all of your amazing support has been for my debut shows on Create and Craft. I would like to thank each and everyone of you......Now that I have seen the shows for myself I have found myself thinking was that really me:) I do think I did manage to hide my nerves pretty well.....no hand shaking lol! But the real me is a lot more chatty and bubbly than you all saw! I hope in time with a few more shows under my belt you will all begin to see the real me:).......I think I was more nervous about saying the wrong thing and sounding silly:)
So now I have got over my first show I have already started prepping for my 2nd which is hopefully going to be the 1st week in January. I will give you all the date when it has all been fully confirmed:)

My card today was a difficult choice as I have quite a few to share with you and lot's of favourites, but I have decided on this one which is using the beautiful Justrite Black Eyed Susan stamp set. I fell in love with this set as it has so many occasions that it can be used for and I just love flowers:)
I chose not to add a sentiment to this card as I thought it is one of those that you can have ready for any occasion!

  • I have started with a black card base measuring approximately 6 1/2" x 8"( an unusual size I know). I then taken some pale pink shimmer card and taken it through my Grand Calibur twice using the Couture Creations Paradise embossing folder. I have matted this onto the black card base.
  • I have stamped the Flower image from the Black Eyed Susan stamp set onto some coconut white card measuring approx 5 3/4" x 5 1/4". Next I have cut the Vintage Labels 2 out to create a frame and inked it with Tea Dye to give it a little distressed look.  I have taken my flower stamp again and marked where I need to stamp so that it matches with the main flower image, so it looks like the flowers are over the frame (I hope that makes sense). I have adhered the frame in place with foam pads to add some dimension. I have then stamped the flowers again twice.
  • To colour in the flowers I have used the Cosmic Shimmer Water paints - Pink Ultra and Pastel Pink. I have used Jade Green and a little emerald Gold for the stalks and leaves and Enchanted Gold for the centre of the flowers. To finish off my main image I have inked the edges with Milled Lavender, matted it onto some black card stock and adhered it to the centre of the card with foam pads.
  • I have made a double bow with pink organza ribbon, adhered it to the bottom of the frame in the centre and added a Crystal Sparkler.
  • Next I have taken some black pearl swirls,(one left and one right), cut them in half and adhered them in position.  I have stamped 2 butterflies, coloured these in with the same water paints and added them to each side of the bow.
  • To finish I have of course added some Stickles - Pink Taffeta
I hope you like my choice of card for today.....My first official blog post as a Demonstrator for Creative Expressions:)! Such an amazing experience and many more to come I hope:)

Full Product List:
  • Card: Foundations
  • Stamps: Justrite - Black Eyed Susan
  • Dies : Justrite - Vintage Labels Two
  • Embossing Folder - Couture Creations: Paradise
  • Ranger Stickles - Pink Taffeta
  • Cosmic Shimmer: Eater Colour Paints - Luscious Greens, Perfect Pastels and Autumn Set
  • Embellishments: Creative Expressions: Black Pearl Swirls, Satin Edged Organza ribbon and aClear Sparkler

Sunday 8 December 2013

My Exciting News

Good morning everyone! I hope you are all having a lovely weekend:) x
So today a can finally reveal that I will be making my debut on Create and Craft today:)
Very exciting:) I can't believe that I have been given this amazing opportunity!!!!! All thanks to Creative Expressions:) x
I will be joining Julia Watts on the Toolshed show at 12pm for 2 hours and again at 5pm! I am extremely nervous but so excited that this is finally happening. The show has some freebie giveaways and some beautiful Justrite, Spellbinder and Cosmic Shimmer products:) I just wish that I had more time to make more samples as my crafting mojo went into overdrive:)
I will be adding some more show dates soon to my blog and Facebook. I will be getting the chance to work with some of the most fabulous and gorgeous products and am looking forward to 2014:)
Thank you all so much for following my blog and leaving your comments as without you,
my dream would never have happened:) x
Here is a little sneak peak at a card that I will be on the show:

Friday 6 December 2013

Christmas Decorations

Afternoon everyone! I hope you are all well and not over doing that Christmas shopping:) x
I still haven't made much of a start, but I still have a few weeks....5 children to buy for, 4 grandchildren, ....oops maybe I should get my backside out of my craft room !!!! I am thinking :)
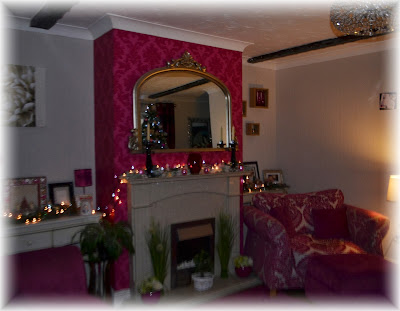
So as promised I have a few pictures of my Christmas decorations to share with you all......did you guess right on my colour scheme?.....It just had to be pink lol!!!! Well it does co-ordinate with my main living room:) And I have to say that did take some convincing my hubby....bless him!
Well I have done the traditional and a few years ago I went super modern with black and red.....you will notice my kitchen is still has modern looking decorations, but next year I plan to be a bit more vintage in there too.
I have tried to go with a fairy tale kind of tree, but if you can see in the close up I still wanted to incorporate my decorations that I made a few years ago:)


So there  you go.... my Christmas decorations!!!!! Not brilliant pictures I'm afraid:(
No card today, but tomorrow I will be sharing my exciting news and a card!!!!

Wednesday 4 December 2013

Heartfelt Creations Wednesday

Good morning everyone! How are you all? I am guessing you are all in the swing of the Christmas shopping and last minute card making:).....Me? I haven't really started:( Christmas trees and decorations are all up though so it is feeling really festive:) I will post a picture of my take on winter wonderland maybe tomorrow or Friday. What colour do you all think my theme is? Hehe I am sure many of you will probably guess right:)
So any way on to my Heartfelt Creations card for today. As always do hop on over to the Heartfelt Creations blog for lot's of inspiring projects...there are some stunning creations:) You will also find details on a cash giveaway......don't miss out:)
I have gone for a clean elegant look for my card today in luscious creams and black using the floral Key stamps:


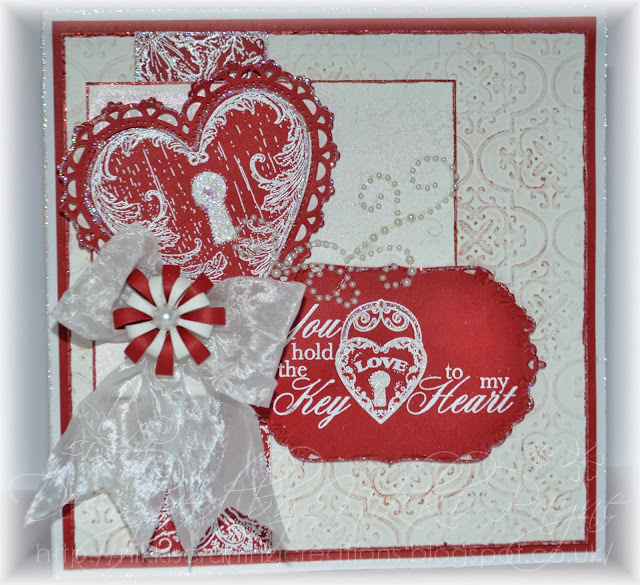
Key to my Heart
Heartfelt Creations products and products carried by HC
HCPC 3574 Journey of Love Keys pre cut set
HCPC 3571 Keys and Roses pre cut set
HCD 741 Burnished Key Die
HCD 701 Posy Patch die
HCPC 3303 Posy Patch pre cut set
HCD 728 Timeless Amour Die
253867 Fancy Lattice
031459 Gold Labels Four
Instructions:
Other Products Used: Spellbinder Labels Four, Black Archival Ink, Cosmic Shimmer Glitter Jewels – White Ice, Black and Cream card, 7”x7” black card blank, Cosmic Shimmer Clear Sparkle Embossing Powder, Cream Decorative Lace, Embossing Ink, adhesive, die cutting machine
Begin with a 7”x7” black card blank.  Next stamp the heart from the Journey of Love pre cut set onto cream card using black Archival Ink twice. Die cut them out using the Timeless Amour Heart die. (You can put the outer decorative part of the hearts aside for another project). Die cut the Timeless Amour hearts out twice in black card. This time you need the outer decorative hearts.  Stamp the sentiment from the Journey of Love Keys pre cut set onto cream card and die cut out using the Gold Labels Four die and layer up onto the Labels four die, cut out in black card.  Die cut the Posy Patch flowers and stamp with the matching stamp to make one layered flower. Die cut the keys and locks out with the Burnished key die onto some black card and also cream card.....The ones you don’t require you can use on another project.( As I required only a couple I cut them out and took the die to the stamp and some I didn’t stamp, so I found this easier).
I used embossing ink and powder on the lock and the heart lock. I didn’t stamp the smaller keys.
Die cut the Fancy Lattice in cream card and mat this onto some black card with a small border. Take a piece of cream card measuring 6 ¾” square and mat this onto the black card blank. Stamp the keys from the Keys and Roses pre cut set on the bottom of the card as in picture.  Adhere some lace from the back of the Fancy Lattice mat that you made earlier and adhere this to the top of the card. Assemble the hearts and the sentiment mats as in picture.  Adhere the flower and 2 small keys to the bottom of the right hand side heart.  Adhere the lock to the centre of the Roses and Keys which you stamped onto the bottom of the card earlier. To finish of the card add some of the Cosmic Shimmer Glitter Jewels – White Ice.

I will be back tomorrow to share another card.....ummmm and my exciting news is coming in the next few days:)