Showing posts with label My Canvas Designs. Show all posts

Friday, 19 April 2013

ANOTHER MIXED MEDIA CANVAS ...... I'm loving creating these :) _ and a card for my son !

So it's Friday! I can't believe that I have actually crafted every single day :) and finished all the projects that I started...... Mr Mojo has certainly been on my side this week! Well as hubby said ...... I hope you gunna use all that stuff that you have just bought (from Ally Pally) and I replied off course, not knowing what you actually do with half of it hehe :) So I have had a really fun filled week playing....
I have 2 projects to share with you today....... a canvas and a card for my son
I decided not to watch You Tube videos to see what to do with them, cus once I get started I realise that I have actually spent all day on the computer and not actually done any crafting...... we've all been there, haven't we ? :) So I just had a hop around a few very talented blogs and got my inspiration..... and I haven't looked back!
I am really pleased with the outcome of this one:) Believe it or not ..... it was actually a last minute thought and I completed it in just under 2.5 hours, that is very good for me :) I just went with the flow!
So here it is - Another canvas:

 
 The canvas measures 20cm x 38cm. I have taken a picture with all the items that I used to create the background and some pictures of it in more detail:


  • I randomly cut a few of the papers up, and layered them a little in the centre of the canvas, just off centre leaving a couple of inches on the right side and about 3inches on the left hand side.
  • I used different shades of blue acrylic paints including a pearlescent one. I sponged these on and went over the papers a little.
  • I then stencilled the circles using a bluey grey mix of acrylics and grunge paste, I gently dried this off of slightly using my heat gun (on low heat) and went over it again in the pearlescent blue paint.
  • The picture has been layered onto the spellbinder detailed scallop frame and adhered off centre onto the canvas.
  •  I have used shabby white frantage on the tags and flourishes and glued my chosen words onto the tags. (put these to one side).
  • Next I adhered the lace and pearls on thread to the top and bottom of the canvas.
  • I took all my elements including the flowers, wooden flowers/foliage, metal trinket, flourishes and tags and placed them on the canvas without adhering in place until I was happy with the design. ( I take a photo at this stage of my projects so that I remember where I want them to go). Once I was happy I adhered them all in place.
  •  I also added a little lace to the tags.
  • I have then added a little dried gypsophilia, adhered the crystal gems and crystal flourishes.
  • Finally I added the butterflies and used a little more white frantage in the bottom left and top right hand corners.
Items Used:
  • Canvas - I purchased mine in a pack of 3 from Wilko
  • Acrylic paint - Docrafts and Paper Artsy
  • Shabby White Frantage - Stampendous
  • Emboss it dabber - Ranger
  • Flourishes, tags, flowers, wooden flowers/foliage, crystal gems, crystal flourishes and butterflies - Prima
  • Words - KCo
  • Spellbinder - 5x7 detailed scallops
  • Black lace and pearls - not sure:(
  • Papers - Nature Garden and Engraver - Prima
 I would like to enter my canvas into the following challenge:
Happy Campers Crafting Challenge- use a mask or stencil
 
A Little Saucey Birthday Card
 Another project that I would like to share with you today is a clean and simple card for my son.
This was rather a challenge for me as recently I have found myself adding more and more bling and embellishments..... and my son, Kieran really wouldn't appreciate a card that I have not only spent hours creating, but also anything that remotely sparkles or looks girly:) although I did manage to sneak a few matt black pearls on to it.......


 I would like to enter this card into the following challenge:
Love to Create - One for the Guys
 

Thursday, 18 April 2013

SMILE AND BE HAPPY

Hi everyone, well it's already Thursday and I hope you have all having a good week.
I'm getting excited as Saturday I am visiting Sir Stamalot in Peterborough for my first Copic class, so hopefully I will be coming away with lots of new colouring techniques:), I really enjoy colouring and find it's really relaxing, but when it comes to using darker colours I really struggle so thought some classes would be a very good idea and Peterborough is only 15 mins away from me :)
Today I would like to share a little mixed media project with you.
On my travels through blog land I have been really inspired by some of the techniques that I have seen, so thought I would have a go at using some masks, acrylics and gesso.
The gorgeous little girl in the photo is my grandaughter Amelia :) She is 19 months old x


 I am going to be completely honest with you....... the background was more of an accident than technique:), it went a bit wrong as I thought to speed the drying up I would use my heat gun and yes I guess you can't, however I liked this effect so kept on going.
I have used a mix of acrylics, gesso and then used the tiny circle mask from Prima and stenciled the black dots onto it. I have then used shabby pink and shabby wine frantage.
I have taken a few pictures with the items that I used to create the background :


  • The Spellbinder dies that I used are Opulant Ovals and jewel flowers and flourishes.
  • The metal round trinket which I have used shabby rose frantage on, the wooden flowers and butterfly are from Prima.
  • The papers I have used are Prima - Nature Garden
  • The gems and flowers are from The Hobby House, and the large roses i'm not sure:(.
  • The flourishes and banner that I have frantaged are both from Prima.
  • The words are from KCo
  • All the pearls are from my stash.
Here are a few more pictures showing a little more detail :


I would like to enter my prject into the following challenge :
Happy Campers - Use a Mask or Stencil


Wednesday, 17 April 2013

A Little Bit of Recycling!

Happy Wednesday people.  Gosh how the weeks are flying by I can't believe we are half way through April already :)
Yesterday I managed to create a few co-ordinating projects using Prima Nature Garden collection papers.
This box is 7cm x 12 cm I covered it in the papers and used flowers, butterflies, say it in crystals gems and wooden embellishments all from Prima!


The pink lace with gems is from Live and Love Crafts.
I have used the smallest dies from Spellbinder- Opulant Ovals and cut using gold metal foil to create the corner decorations.
I have heat embossed the wooden embellishments using encrusted jewel kit from Stampendous.

The key and lock are from are from Prima and also the 'precious' sentiment on the front of the box. I have embossed the key and lock and used glossy accents on the key.

My next project that I have made using co-ordinating Prima embellishments is a Bangle, small hair clips and a large hair clip. The bangle and large hair clip have been recycled from my old jewellery and hair accessory box:)


I would like to enter these projects into the following challenge-
Artistic Inspirations - anything but a card (The box)
Crafty Boots Challenge - Recycle (The bangle)
Everybody-Art-Challenge - Bling (The box)


!

Tuesday, 16 April 2013

Time for Tea

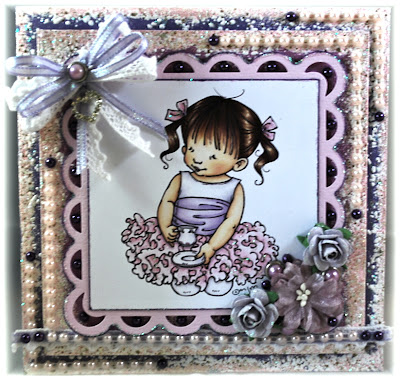
Good morning everyone. Today I would like to share a card which I have made with some of my new goodies that I purchased from Ally Pally at the weekend.
I normally go for 8x8 size cards, but I thought I would make a small card today (14.5x14.5) using a topper from The Hobby House - Tea Time by Mo Manning:).  I really am going all out today as again I don't normally do toppers, but they are just perfect for those days when I just don't have time to colour my image....... I'm thinking they are going to be very useful. I am loving these images so I can definitely say that the stamps are going to be on my newest NEED list :).
  • I have used purple shimmer card to make the card base
  • Matt and layered the image with co-ordinating die cut shapes and frames (The Hobby House)and then onto co-ordinating card. Before putting together I have used shabby pink embossing enamel around the edges.
  • The roses, pearls, and brads are from The Hobby House.
  • Silk flower in the centre of the cluster is from Prima.
  • Lace and ribbon is from my stash.
  • The heart charm - Mei Flower
  • I have then finished of the card using stickles.
Here are a few more pictures to show you the detail a little better -


I would like to enter this card into the following challenges -
Lexi's Creations - Lace and/or Ribbon
The Crafty bloggers network - Anything Goes
Ladybug Crafts TLT challenge - A card for a child or teenager


Monday, 15 April 2013

Little bit of Gothic Glamour

HI, fellow bloggers. I hope you are all getting some gorgeous Monday sunshine :)
Today I would like to share an 8x8 Saturated Canary card with you she is called Honey.
I made this card for my sister..... who although girly has a little gothic glamour going on and she wears boots like these:) (although not pink like these ones).


Items I used:
  • 8x8 black card blank
  • purple shades of card
  • Spellbinder dies used -
  • Gold Elements one
  • H/F/C - Delicate Asters
  • Jewel flowers and flourishes
  • Decorative Labels Eight
  • A2 curved matting basics A
  • Silk flowers - Prima
  • crystals and crystal corners - Prima
  • pearls and black flower pearls on thread - The Hobby House
  • Tiny sequin flowers - Mei Flower
  • Large diamond pendant - Live and Love Crafts
  • Black, purple ribbon and black lace - my stash
You will notice that I have used some of my new goodies on this card:)


I would like to enter this card into the following challenges -
Saturated Canary - Anything goes
Deep Ocean Challenge -  Flowers and Fantasy (she does have Fantasy  purple eyes)
Crafts and Me Challenge - Lace and Pearls


Friday, 8 March 2013

Spellbinder Academy - WALL CANVAS

Today I would like to share with you a wall canvas.   I attended a Spellbinder Academy class at Christine Embersons new shop/studio called Hope and Chances http://hope-chances.blogspot.co.uk/


Notice the Bezel in the corner, you can do so much with these and if you visit Christines blog she has a post explaining all about mixed media and Bezels.  It was a very enjoyable day and I already have another class booked for the 17th March :)

These a two others that I have made -  


For this one I have used papers from papermania
- Spellbinder dies ....
- Bitty Blossoms
- Daisy flower topper
- Venetion Motifs and Accents
The background stamps i have used are from Viva I think (sorry I have had them for a few years)
- Creative Expressions - fancey pearls & pearls swirls
- Victorian velvet and spun sugar distress inks
-clear and white embossing powder
- crystal stickles and some pearls


For this one I have used papers from Kaisercraft - Utopia Collection
- Spellbinder dies ....
- Heartfelt creations...decorative window scene
- Die d-lites... frame one
- les papillions two
- Bitty Blossoms
- Rose creations
- labels four small
- Die d-lites... frame one
- Silver decorative corners
- Brads, pearls and stickles glitter
- (Tim Holz collection)- Stampers anonymous 'good thought' stamps
- Milled lavender, iced spruce and spun sugar distress inks .


  •