Thursday 27 February 2014

Heartfelt Creations and exciting news!


Good evening everyone.
I didn't blog Heartfelt Creations Design Team project yesterday.....time just flew away:(
I have made another card using the Raindrops on Roses collection. You will find all the details over on the Heartfelt Creations blog HERE and more gorgeous inspirational pieces from the design team!


I have used the background stamp to create my main image. I coloured it in using distress markers.


Now for my exciting news.....I will be on Create and Craft tomorrow, Friday 28th Feb at10am bringing you all some absolutely beautiful products from The Hobby House:). The products always sell out so be sure to get in quick as we only have a one hour show:(....I have 3 demonstrations prepped so I hope to make it a good show!
Here's a sneaky peak at one of the samples that I have made:

The papers and embellishments are from The Hobby House. The dies are Spellbinder and Heartfelt Creations and the image is a stamp from Heartfelt Creations - Floral Keys and Lockets.

Take care x

Monday 24 February 2014

Blog Candy Winner!

Good afternoon fellow blogging friends. It's been a few days since I last blogged. I have been busy creating some cards and projects for something rather special which I can share with you later this week:)....I think you might like it though:) x

So today it is time to announce my blog candy winner.......Drum Roll!!!!!......... Congratulations.................Stephanie Cunningham! Well done....If you email your details I will get your goodies posted off to you:) x

A big thank you to all of you that left a comment....I will be launching another blog giveaway very soon:) x

Now for my card that I would like to share with you today.
I have used papers and the Decorative circle die from the Heartfelt Creations Collection - Raindrops on Roses. I made the flowers from the Vintage Blossom stamps and dies (Heartfelt Creations).  The flourishes are Spellbinder - Jewel Flowers and Flourishes. The pearls are from The Hobby House and of course I have added a little Stickles Glitter!


Yes! another purple and lilac card......But I do love these papers and because I chose to use a decorative panel rather than stamp my image it was a quick card to make:)
Sorry it is a shorter post than normal, but I really must get back to my crafting:)  I had the weekend off as the sun was shining and I did some spring cleaning.  I hope you all had some nice weather this weekend too:) I know it isn't quite spring yet......but we have to make the most of this sunshine, don't we? We don't seem to see it much these days:(

Take care everyone,
I will be back soon with some news on what I am prepping for:).....maybe a Create and Craft show?......hehe, sorry I can't share today:(

Wednesday 19 February 2014

Raindrops on Roses - Heartfelt Creations

A very good morning to you all! Wednesday already:( I just don't no where this week has gone!
It is that time of the week again when I share my Heartfelt Creations Design Team project with you all.
I have made a card using the  absolutely gorgeous Raindrops on Roses collection......I just adore these papers.

 
I have used the Posy Patch flowers to create the flowers
 
I stamped the sentiment and heat embossed it in clear embossing powder.

Heartfelt Creations Products and Products carried by HC
HCD 743 Raindrops on Roses die
HCPC 3583 Adorned in Roses precut set
HCDP 240 Raindrops on Roses Paper Collection
HCD 701 Posy Patch die
HCPC 3303 Posy Patch Flowers precut set
452255 Grand Calibur
209348 Spellbinder Floral Ovals
Other Products Used:
Clear embossing powder, Memento ink – Grape Jelly , Distress Ink – Milled Lavender, Stickles Glitter – Diamond, dusky pink card, pale pink card, lilac card, flat lilac pearls, decorative pearl button, vintage charm, 3 handmade pear pins, deep dusky satin ribbon, Glitter Frantage, Embossing ink, Heat tool
Instructions:
Start with a card blank in pale pink card measuring 6 ½” x6 ½”. Cut a piece of dusky pink card measuring 6 ¼” x 6 ¼” and adhere to the card blank. Choose a decorative 6” x 6” panel from the Raindrops On Roses papers, cut out and adhere to the card. Die cut out 2 of the Raindrops on Roses decorative die in lilac card and also 2 decorative circle in pale pink card. Stamp the Birthday sentiment out with the Milled Lavender ink and heat emboss with the clear embossing powder. Die cut it out with the Spellbinder oval. Cut one of the decorative circles out into 4’s and adhere to card as in picture. Next adhere the 2 decorative lilac die cuts. Take the other decorative circle and cut again into 4 (you may need to cut a little off of each so that they fit nicely under the Oval) and adhere to the centre of the card so that when you add the oval they have just a little showing. Adhere the oval with 3D foam pads. Stamp and die cut various sizes of the Posy Patch flowers, enough to make one medium, one small and one extra small flowers and 1 single medium flower. Die cut 2 of the foliage flourishes from the Gift Ensemble die set in some green patterned paper from the paper collection. Adhere the 3 flowers and foliage flourishes to the top right hand side of the oval and add the decorative pearl pins. Make a bow and adhere to the bottom left of the oval. Add the flower to the bow and adhere the pearl button to the centre. Take the vintage embellishment and adhere to the bottom of the bow – I added some glitter frantage to the centre of the heart. To finish add some Stickles Glitter.
For lot's more inspiration take a look at the Heartfelt Creations blog HERE.....The Design Team will amaze you with there creations:)

Don't forget to enter my blog candy....you will find a link in the sidebar!
Take care x


Monday 17 February 2014

Love Hearts - Blog Candy

Good evening all!  Where did the weekend go? I planned on launching a new blog candy yesterday however my weekend got took up when hubby wanted to spend Saturday looking at cars......exciting but just doesn't have the same buzz as craft shopping:) but I was the supportive wife and he is now a happy hubby:)
Yesterday I cooked for 14 members of my family......my sister bless her has been waiting for her new cooker to be delivered and it has been delayed so I thought hey I could cook a roast dinner for them:) but obviously I had to invite all the children and grandchildren:) It turned out to be a lovely weekend......My family are so precious to me:)
 

Exciting Date For Your Diaries

Back in the craft room today, I have started prepping for my first Heartfelt Creations show! I don't have times yet but the date is March 13th:)  I will let know times nearer the date!
 

Love is in the Air!

So to my card I would like to share with you today.....it is a Valentines card which I made for my son for his girlfriend....they are only 15 and have been going out for nearly 2 months, so sweet......he didn't want anything to fussy!


I started with a red card blank measuring 6 1/2" square. I took some white card measuring 5 3/4" x 5" and put it through the Grand Calibur with the Couture Creations embossing folder - Cheerful. I inked over the embossed area with Distress Ink - Fire Brick. I adhered this to the top half of the card.
Next I die cut out the decorative heart from the Heartfelt Creations die set - Timeless Amour in red card. I adhered these as in picture, only gluing just the centre piece of the open heart so that it sits away from the card. I used the Martha Stewart Heart punch to create the 2 bottom borders.
I die cut 2 medium Bitty Blossom flowers in white card and 1 large in red card. The leaf swirls are from the Heartfelt Creations die and stamp set - Bella Rose. I stamped them out in the Fired Brick ink.
The little heart locket is from the Heartfelt Creations Burnished Key stamp and die set. I adhered all these elements to my card. The tiny hearts around the outside are the leftover bits from the punched border. I have added some pearls to the centre of the flowers and small ones to the centre of each tiny heart.To finish of the card I add some Stickles Glitter.

       Blog Candy Giveaway

Right! So who would like to win some gorgeous crafting goodies?

All you have to do is leave a comment so that I can put you into random org....It would be nice if you was a follower of my blog, but no pressure. I only want you to follow my blog If you like my creations:) x This Candy will end on Feb 24th when I will announce the winner!
Take Care x

Friday 14 February 2014

Yipee....Guess who is back with The Hobby House :)

Hello fellow blogging friends......Happy Valentines Day!  I hope you have a nice one:) x

I would like to thank you all for your kind comments regarding Heartfelt Creations.....it means so much to me that you all understand my decision....THANK YOU X

Today I am excited to tell you all that I have re joined the fabulous Hobby House Design Team....Yipee!
 I have been doing the 'Happy Dance' since I was asked by the design team co-ordinator Kate Wiles and Jill the owner of The Hobby House if I now was available to re join:) Obviously I couldn't turn down such a request....I now will be able to use all of there yummy! Scrummy embellishments....my favourites have to be there pearls on string.....I just adore using them on my projects! And not forgetting the beautiful card toppers from artists such as Mo Manning, Sylvia Zet, Elizabeth Bell and Kenny K. They are just perfect for those days when you don't have time to colour an image or when you have lot's of cards/projects to create!
For those of you that who are not familiar with The Hobby House.....(you may have seen them on Create and Craft) here is a link to there online shop HERE Also for lot's of inspiration and if you like to participate in challenges here is a link to The Hobby House Blog HERE

So here is my inspiration card using a Sylvia Zet topper and the Peach and Green Embellishment Kit which you can find HERE on the website.


Card details:
  • I started with a 7"x7" card base and adhered some olive green cardstock to it.
  • I then cut some patterned paper from the NitWits collection and matted it on some cream card. I used some distress inks - Tea Dye around the edges. I adhered these to my card.
  • I then took a piece of cream card measuring 6 3/4" square used a Martha Stewart punch on the corners and took through my Grand Calibur with the Couture Creations embossing folder - Joes Garden. I also inked the edges and  adhered it to my card.
  • I die cut the small Spellbinder Grand Decorative Circle in cream card and inked the edges. I took my Sylvia Zet topper and again inked the edges and adhered it onto the Decorative Circle and adhered this to the centre of the card.
  • I die cut 2 of the foliage swirls from the Heartfelt Creations Gift Ensemble die set, inked a little whilst still in the die and added these with the Hobby House roses in a cluster to the bottom right of my topper. 
  • I made a bow (the ribbon is also from the Peach and Green embellishment kit) and added a rose to the centre and adhered it to the top centre of the card.
  • Finally I added the gorgeous Hobby House embellishments from the Peach and Green embellishment kit and some stickles glitter -Diamond.
I hope you like my card today....cute but I think not to cute:)
Take care and I hope you all have a wonderful Valentines Day X
I will be back on Sunday to launch another Blog Giveaway:)

Wednesday 12 February 2014

Lady Roselie - Heartfelt Creations

A very good morning to you all.
Before I share my card with you all today I have a little announcement that I feel that I should make.

It is with great sadness that I had to make a very difficult Decision.


As all my fellow bloggers know, I have been with Heartfelt Creations for almost a year.....in actual fact they were my first ever Design Team which I applied for and successfully became part of!
Most recently I have become a Creative Expressions Demonstrator and Design Team member.
I have been asked by Heartfelt Creations if I would like do more workshops all over the UK and also demonstrate on Create and Craft TV. ....Wow! as you can imagine I was overwhelmed with excitement:) However for reasons which I don't feel is in my place to go into I am unable to do both....This decision has left me with many sleepless nights, but I have had to make the difficult decision to leave Creative Expressions.
This does not mean that I don't love working with there products or doesn't mean that my admiration for Sue and all the design team members has changed. All I can say is that I haven't made this decision lightly and I will always be thankful for Creative Expression for everything that they have done for me.
I hope you all understand, I had to make a choice.....Life is a journey and sometimes we find ourselves on a roundabout and have to choose which turning to take.......I believe that I have taken the right one and am looking forward to bringing inspiration to you all through Heartfelt Creations.
I hope you will all join me in my new adventure:)


So today sees the world launch of a brand new collection Raindrops on Roses!  You may have seen the dies and the background stamp on the CHA Create and Craft shows however you may not have seen the lush papers and other beautiful stamps which are now available.

 The decorative and intricacy of this die will enable you to create frames, borders, and endless opportunities for layering with your favourite images. Pick up the classic image stamps to create a stunning masterpiece. These background, accents and sentiment stamps will add a delightful classic touch to every project you create.
The Raindrops on Roses paper pack is loaded with saturated greens and purples and sprinkled with colourful clusters of roses. Card panels, 6x6 sheets, coloured tags and journaling blocks will add the finishing touches to your projects.

Leave a comment on the Heartfelt Creations blog by February 18th to be entered to win the entire collection valued at $175.93.  and check out the gorgeous projects that the Design Team have created! x
To A Special Someone


Heartfelt Creations products and Products held by HC
HCPC 3584 Lady Roselie pre cut set
HCPC 3303 Posy Patch Flowers pre cut set
HCPC 3545 Open Leaf Pre cut set
HCD 736 Classic Leaf die
HCD  701 Posy Patch die set
HCD 743 Raindrops on Roses die
HCDP1 240 Raindrops on Roses Paper Collection
Circle Grand Nestabilities 452062
Other products Used:
Distress inks: Milled Lavender, Distress Markers: Scattered Straw, Milled Lavender, Victorian Velvet, Tattered Rose, Versafine Ink – Vintage Sepia,  cream card, olive green card, cream card base, Stickles Glitter – Milled Lavender, cream flat pearls, Spellbinder die set – Decorative Labels Twenty-Two

Instructions:

 Start with a square card blank and ink the edges with Milled Lavender Distress Ink.
Choose a green piece of decorative paper from the paper collection and cut to 7 ½” square. Adhere it to the card. Choose a 6”x6” decorative panel from the paper collection and adhere to the right hand side of the card at an angle. Die cut 4 of the decorative circles from the Raindrops on Roses die set. Stamp the Lady Roselie onto some white card using the Vintage Sepia ink and colour her in using the Distress Markers listed.  Die cut out using the Grand Circles die set and ink a little with Milled Lavender. Next take the 4 die cut decorative circles and adhere from the back of the Lady Roselie as in picture. Adhere to the card.  Stamp the sentiment ‘To a Special Someone’ onto white card and die cut out with the Spellbinder die – Decorative Labels Twenty-Two (2nd from smallest). Ink the edges with Milled Lavender and adhere to the right hand side of the card.  Die cut and stamp 3 of the larger leaves in green card.
Die cut and stamp a selection of the Posy Patch flowers in papers from the paper collection, enough to make a nice cluster of flowers. Adhere the leaves and flowers to the right hand corner of the card. Add pearls to the centre of the flowers. To finish add some Stickles Glitter to the outer edge of the card and to the outer edge of the circle die.

 Thank you all for taking the time to read my extra long post today.
Take care x


Saturday 8 February 2014

Flamenco

Good morning everyone! I hope you are all having a good weekend:)
Today my card I am sharing is another from my show back in January using the gorgeous and very elegant Dress stamp - Flamenco along with lot's of other Creative Expressions products!


Card details:
  • I started with a black card base measuring 6 1/2" square.
  • I then cut a piece of the Teresa Collins paper and put it through my Grand Calibur with the Couture Creations embossing folder - Taylor. I then used Gilding Wax - Enchanted Gold over the embossed area and matted this onto my card.
  • I have die cut the Couture Creations - Irish Dreams in white card and matted it onto a black piece of card. I then adhered this to my card.
  • Next I die cut a Spellbinder oval in the black patterned paper from the paper pad. Using the Couture Creations die set - Ivy Doily, I die cut 3 in black and 3 in the black patterned paper.
  • I then adhered these to my card as in picture.
  • I have stamped the Flamenco dress in black Archival ink and coloured it in using the Mica Pigment powders - set 6 Luscious Greens. I then fussy cut the dress out and adhered it to my card.
  • Next I added some black lace. I have stamped the sentiment out onto white and cut it out and adhered to the bottom of the card.
  • To finish of the card I have added some Stickles Glitter -Pine Needles and a few Creative Expressions black pearls.
Unusually for me this card doesn't have any flowers or ribbon bow , but I wanted to keep it pretty simple and give the impression that the dress is on a 'Catwalk' as in a fashion show......not sure if I have achieved this though!
I hope you like my card choice today:)
Take Care x
 

Thursday 6 February 2014

Monochrome - Majestic Morning Card

Hi everyone! How are you all?
 I wanted to share another Heartfelt Creations card with you using the Majestic Morning collection.
I have made this card in monochrome black and white, which I just love:)


  • First I embossed a black piece of card and matted onto a 7"x7" white card blank.
  • I then stamped the Vintage Morning Background precut stamp with Perfect Medium and heat embossed it with clear embossing powder. I matted it onto some white card.
  • Next I stamped the background stamp again with Perfect Medium but this time onto white card and heat embossed it with clear embossing powder......you will notice that it is slightly grey as I hadn't cleaned my stamp properly before using it but this is what I call a happy accident as I quite like this effect:)
  • I then matted this onto some black card and adhered both panels onto my card.
  • I stamped the Majestic Morning Blooms flower flourish stamp in Black Archival onto a piece of white card and layered it onto a Spellbinder Captivating Square die cut in black card. I coloured it in using some Iridescent Mica Powder - Angel Dust Sparkle, which I mixed with a little water to make a paint. I then adhered it to my card.
  • I stamped the Vintage Morning Background again with Perfect Medium and heat embossed with clear embossing powder. I die cut the flowers out using the Majestic Morning Blooms die set. I then layered 3 of the smaller flowers and created one larger flower which I adhered to the top right of the Captivating Square along with the leaf flourish from the Gift Ensemble die set. 
  •  I added a shabby bow in black and white and a small flower with a sparkler in the centre.
  • Finally I added a few black pearls.
Take Care,


Tuesday 4 February 2014

Heartfelt Creations - Create a Box Class

Good evening everyone!
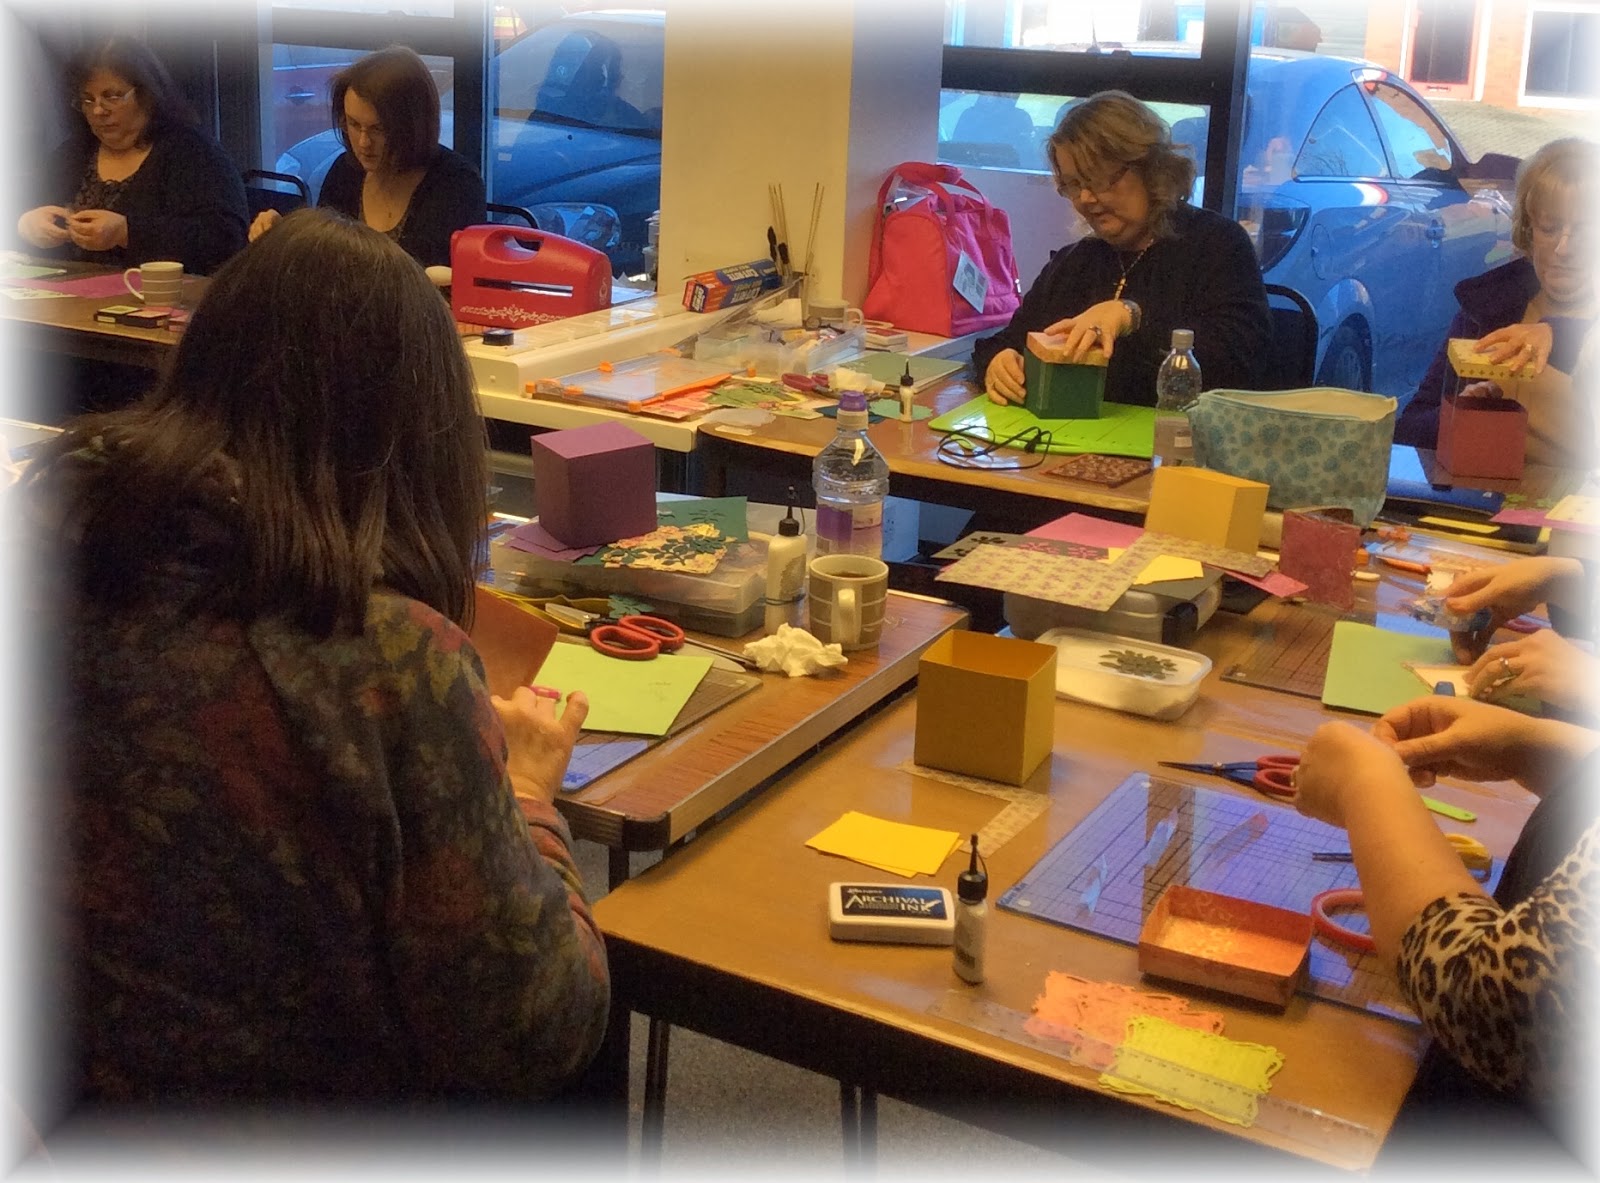
As most of you know I teach Heartfelt Creations classes and on Saturday I took a class of 9 wonderfully talented crafty ladies at Sir Stampalot in Peterborough.
This is my box using the new Majestic Morning Papers and the Majestic Bloom flower die:


The ladies all chose there own papers from the Majestic Morning collection.
Just look at them in action......


              We had a spare 30mins so we decided to make a box using the Gift Ensemble die!
9 happy ladies:)


Another enjoyable day:)


Monday 3 February 2014

Creative Expressions - My first DT card

Happy Monday everyone:)  I am especially happy today as I am now an official Creative Expressions Design Team member.....Yay!!! so very honoured to be joining so many talented crafters:)

Before I share my first project with you I would just like to announce the winner of my latest blog candy.......a little late I know, but I had a class on Saturday ( photos to share with you all tomorrow) and the Grandma duties yesterday and my youngest grandson 'Archie' has a really nasty chesty cough and has wanted lot's of grandma cuddles:) and then to top the weekend off we had a leak from our shower which ended up gushing through the lounge ceiling! Just as well my hubby is a plasterer lol:) but the mess was horrendous:(....so all in all a very hectic weekend!.....

So the winner of my blog candy which was picked by random org ........................................................number 19 which is Pat L! Congratulations Pat......if you email me I will post your goodies off to you :) x

So now for my little tutorial on my Creative Expressions Design Team card:

Thinking of You


I started with a cream blank card measuring 7"x7" square. I then matted a piece of  gorgeous Foundations cardstock called Amethyst onto my card blank with 3D foam pads.

I then took some cream card measuring 6 3/4" x 6 3/4". I took it through my Grand Calibur with a Couture Creations embossing folder called Paradise and adhered it to my card.
 
For the next stage I cut 2 pieces of Amethyst card. The first measuring 3 1/2" x 4 1/2" and the other measuring 3" x 4". I stamped them both with the Creative Expressions background stamp - Leafy Background using Perfect Medium. I then Heat embossed them using Cosmic Shimmer Gold Detail embossing powder. TIP: Don't forget to either use an anti static bag or cloth.
 
 
I then matted them both onto some cream card.


Stamp the sentiment ' Thinking of You' onto some cream card using Distress Ink - Seedless Preserves. Die cut it out with the Spellbinder tag from the Fancy Tag Two set.

Whilst still in the die I inked the sentiment with Milled Lavender.
Next I made 2 Bitty Blossom flowers in the Amethyst card and 1 large in cream card. I used tweezers to make my flower but you can use a twilling tool if you prefer.
I then began to assemble my card. I used some 3D foam pads to adhere the sentiment to give my card a little dimension. I have added some Creative Expressions pearls to the centre of the flowers and cut some Pearl swirls from the larger Pearl Swirl pack. I made a triple bow with some Creative Expressions iridescent Grape Fuchsia ribbon and adhered it to the top right hand of my card.

To finish I added some Stickles glitter - Diamond and Platinum.

 
These are the products that I used:
I hope you enjoyed reading my little tutorial and I hope the photos were useful!
I will be back tomorrow with another project/card.
Take Care X